

Vanilla Extract
Stop Overpaying for Store-Bought Vanilla — Make High-Quality Homemade Extract Instead
Why Homemade Vanilla Extract Is Better:
Better flavor – Homemade vanilla develops a deeper, richer taste over time, unlike many store-bought versions that rely on shortcuts or artificial flavoring.
Simple ingredients – Real vanilla beans and alcohol. That’s it. No fillers, dyes, or unnecessary additives.
Cost-effective – While the upfront cost may seem higher, making vanilla at home costs far less per ounce than store-bought extract, especially high-quality brands, and one batch can last for years with refills.
Customizable strength – Let it age longer for a stronger extract, or tailor it to your baking preferences.
A true pantry staple – Always on hand, always reliable, and made with intention — just the way we believe food should be.
The materials used in this recipe can be found in the link below. + Free printable & customizable labels below!
Yes, they’re affiliate links — they help support our little farm & bakery 🤍)which means we may earn a small commission if you choose to purchase through them — at no extra cost to you. We truly appreciate your support.
How to Make Homemade Vanilla Extract (Beginner Friendly)
Homemade vanilla extract is one of those simple but impressive things to keep in your pantry and once you make it, you’ll never go back to store-bought.
I’m sharing exact measurements, how I scaled it, and what I used 👇
✨ What You Need
• Vanilla beans
• Alcohol (Costco vodka is what we use (see options below)
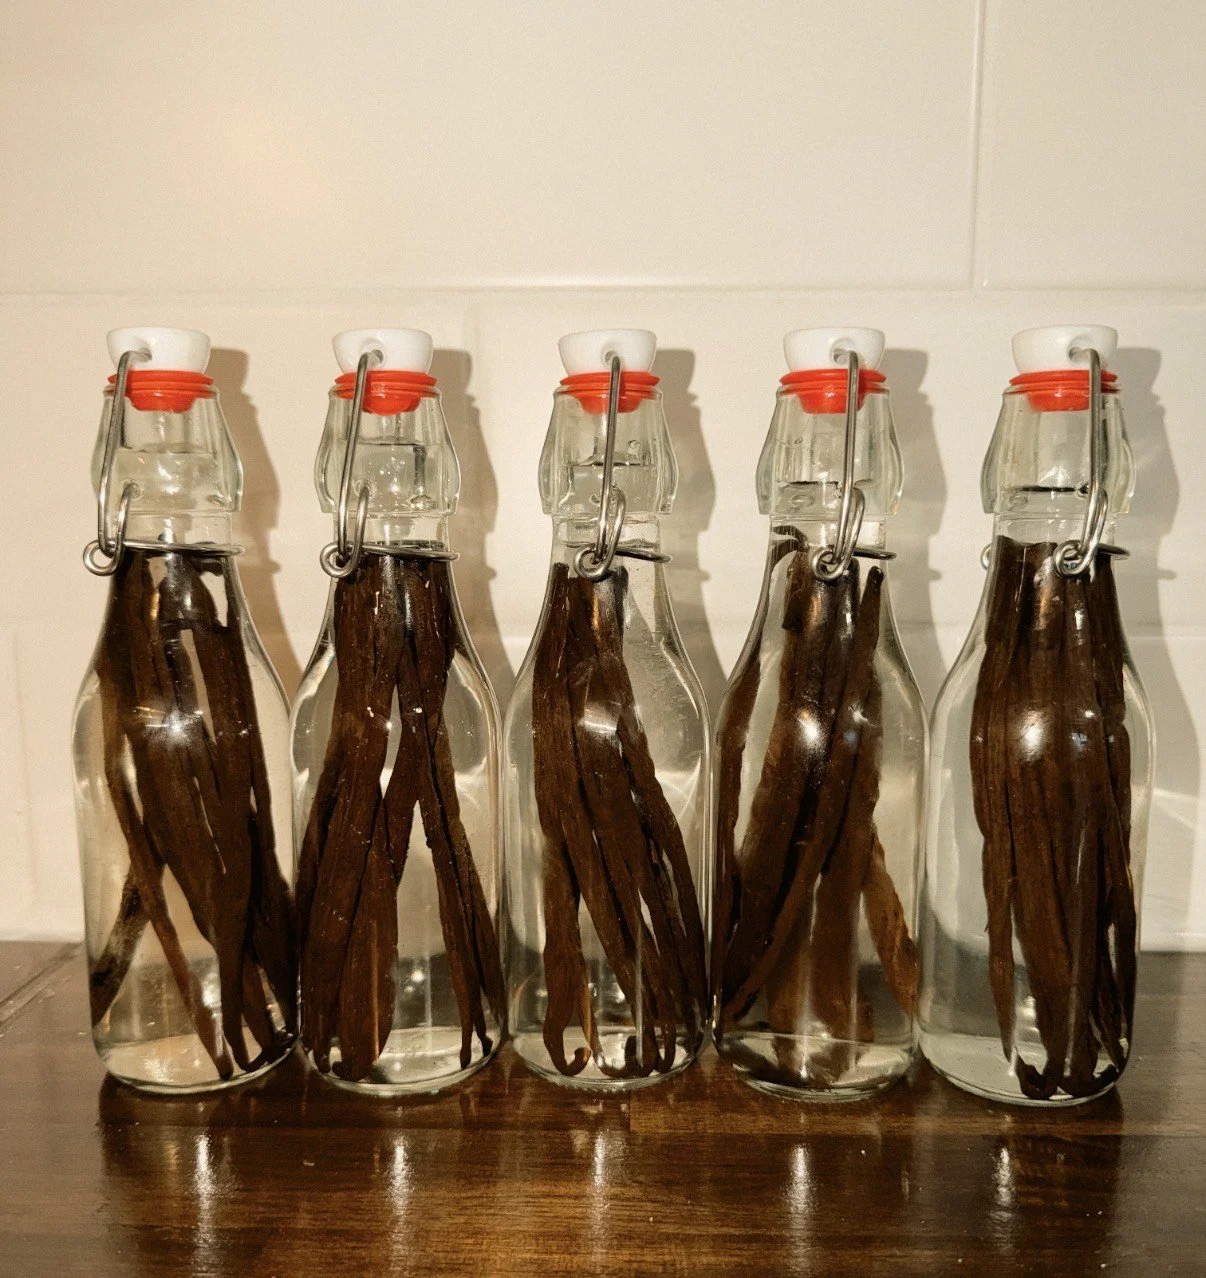
• Glass jars (I use flip-top bottles)
• Sharp knife
• Patience (this part matters 😌)
📏 Vanilla Bean Ratio (This Is the Key)
The standard ratio is:
0.8 - 1oz vanilla beans per 8 oz of alcohol
For reference, that worked out to:
• Approx 8-9 whole vanilla beans per 8 oz jar (Since the pack we buy is 50 beans, I always put 10 in each jar)
👉 A pack of 50 beans made 5 full 8-oz jars for us.
🧮 How to Make a 4-oz Jar (Half Batch)
If you’re making 4 oz jars, just cut everything in half:
• 0.4 - 0.5 oz vanilla beans
• 4 oz alcohol
• About 4–5 vanilla beans
Same process, just smaller jars.
🍶 Alcohol Options (Vodka Isn’t the Only Choice)
We use vodka because it gives the cleanest, most classic vanilla flavor, but you can absolutely use:
• Bourbon – warmer, richer flavor
• Dark rum – slightly sweet, deep notes
• Brandy – smooth and mellow
Use what fits your baking style.
⏳ When Is It Ready?
• Minimum: 6-12 months
• Best flavor: 12+ months
We’ve had multiple people reach out stating they do use theirs around 2 months. It is useable at 2 months but the flavor will be lighter and less concentrated. As it continues to age, the vanilla becomes deeper, richer, and more complex.
For the best results, we recommend allowing your vanilla extract to age at least 6–12 months, with peak flavor developing after one year.
The longer it sits, the stronger it becomes.
Step-by-Step Instructions:
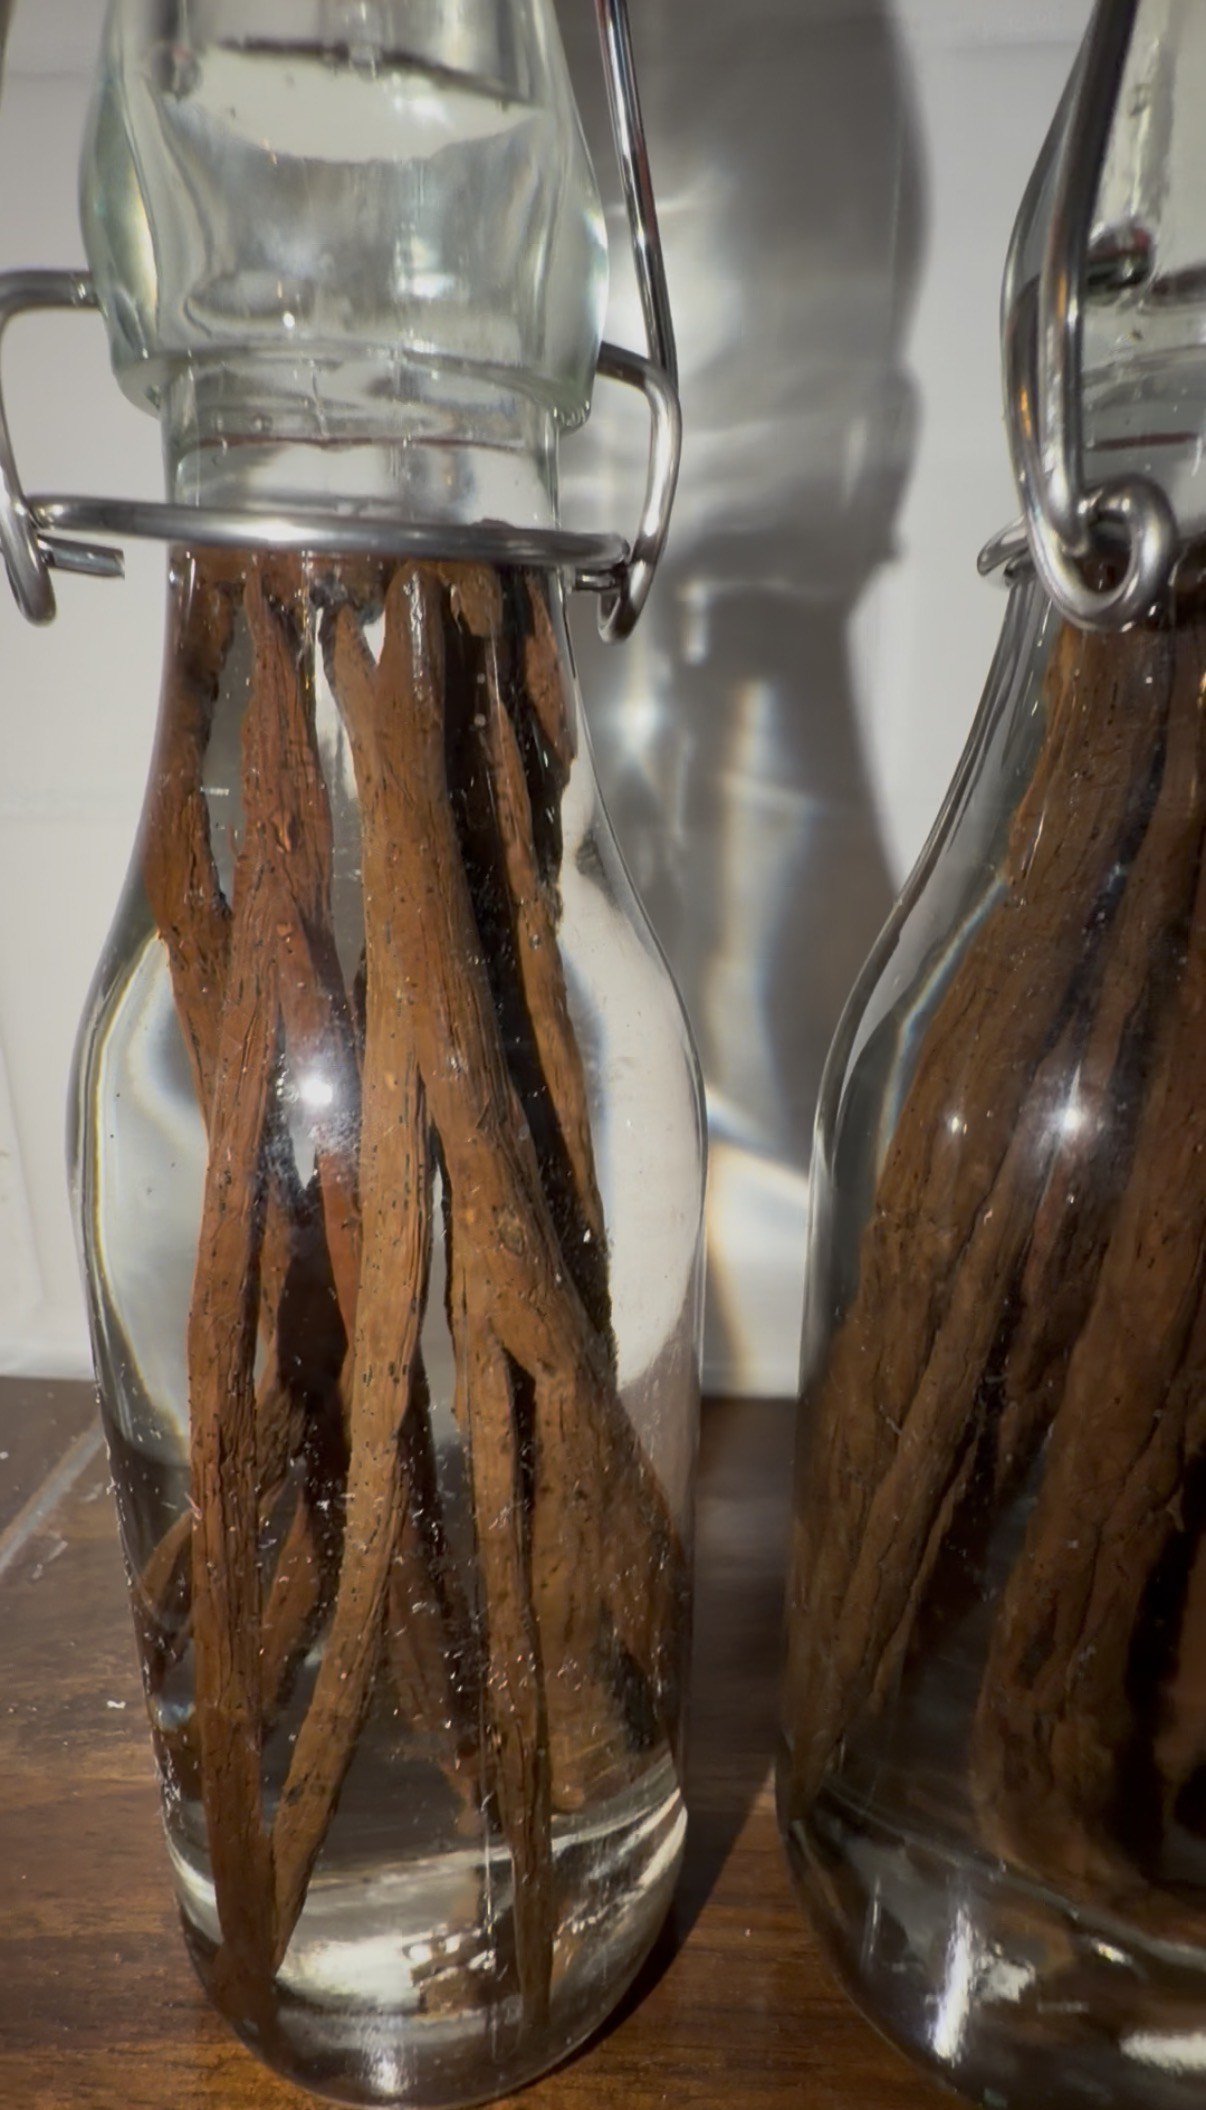
1️⃣ Split each vanilla bean lengthwise (don’t cut all the way through — just open them up).
2️⃣ Place beans into your glass jar.
3️⃣ Pour alcohol over the beans until fully submerged. Seal cap tightly.
5️⃣ Store in a cool, dark place. Shake gently once a week.
🫙 Do You Need to Shake Vanilla Extract?
Yes — but don’t overthink it.
• Shake the jar about once a week for the first few months
• After that, an occasional shake when you remember is perfect
• The goal is just to help distribute flavor as it extracts
If you forget for a bit? Totally fine.
Vanilla is very forgiving.
♻️ Pro Tip
When your vanilla gets low:
• Add more alcohol
• Let it sit again
You can keep a jar going for years by topping it off.
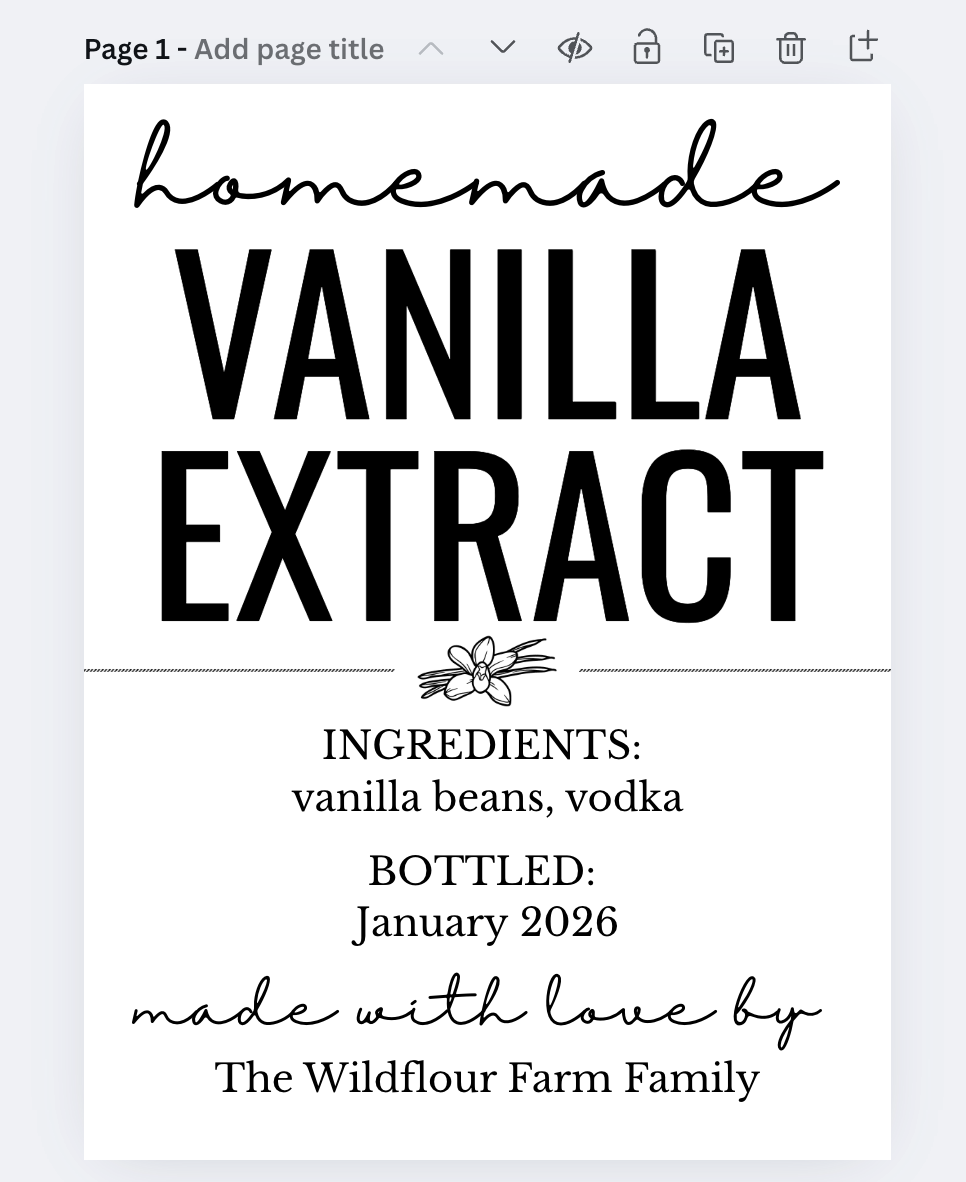
Printable & editable labels I created to add to your bottles. These are 1.5×2 in labels.